A guide to practicing character faces
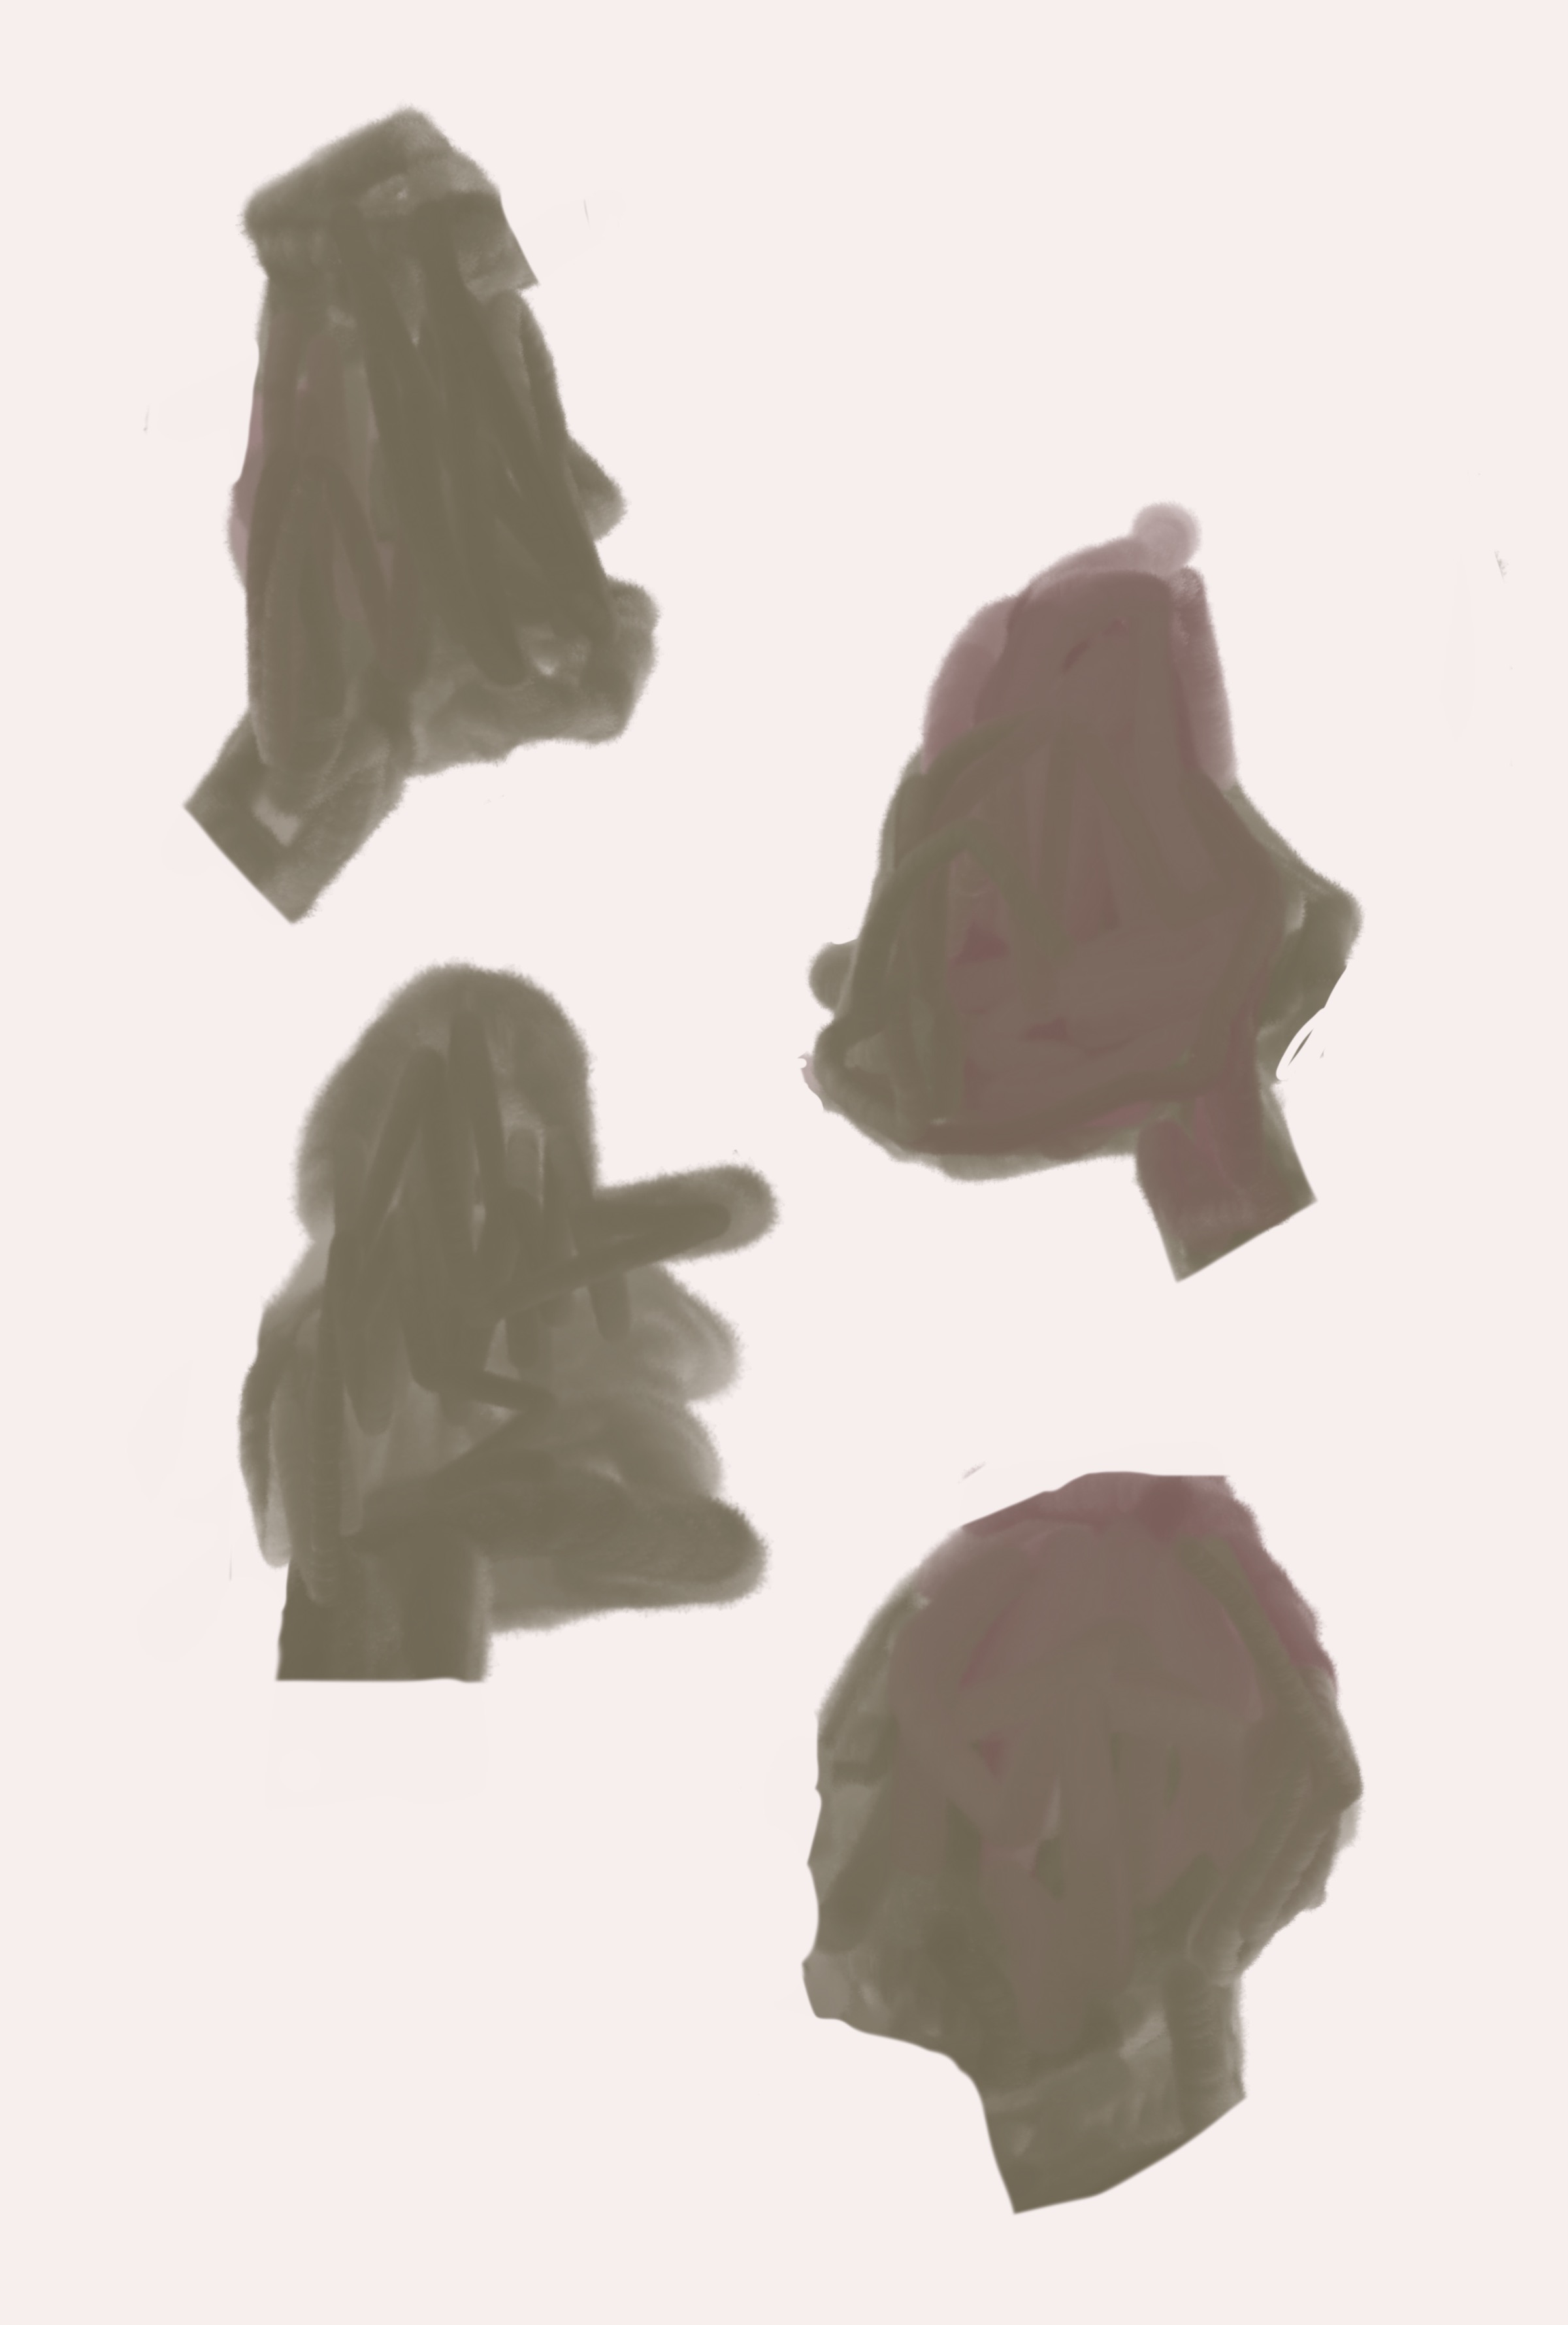
I love doodling, and from time to time, I like challenging myself to improve the way I imagine and draw. Here is what I do. I like drawing blobs of different shapes (silhouettes) and develop them into faces. You may have seen some one do this on youtube, and I do something very similar.

Happy sketching!
Draw Silhouettes
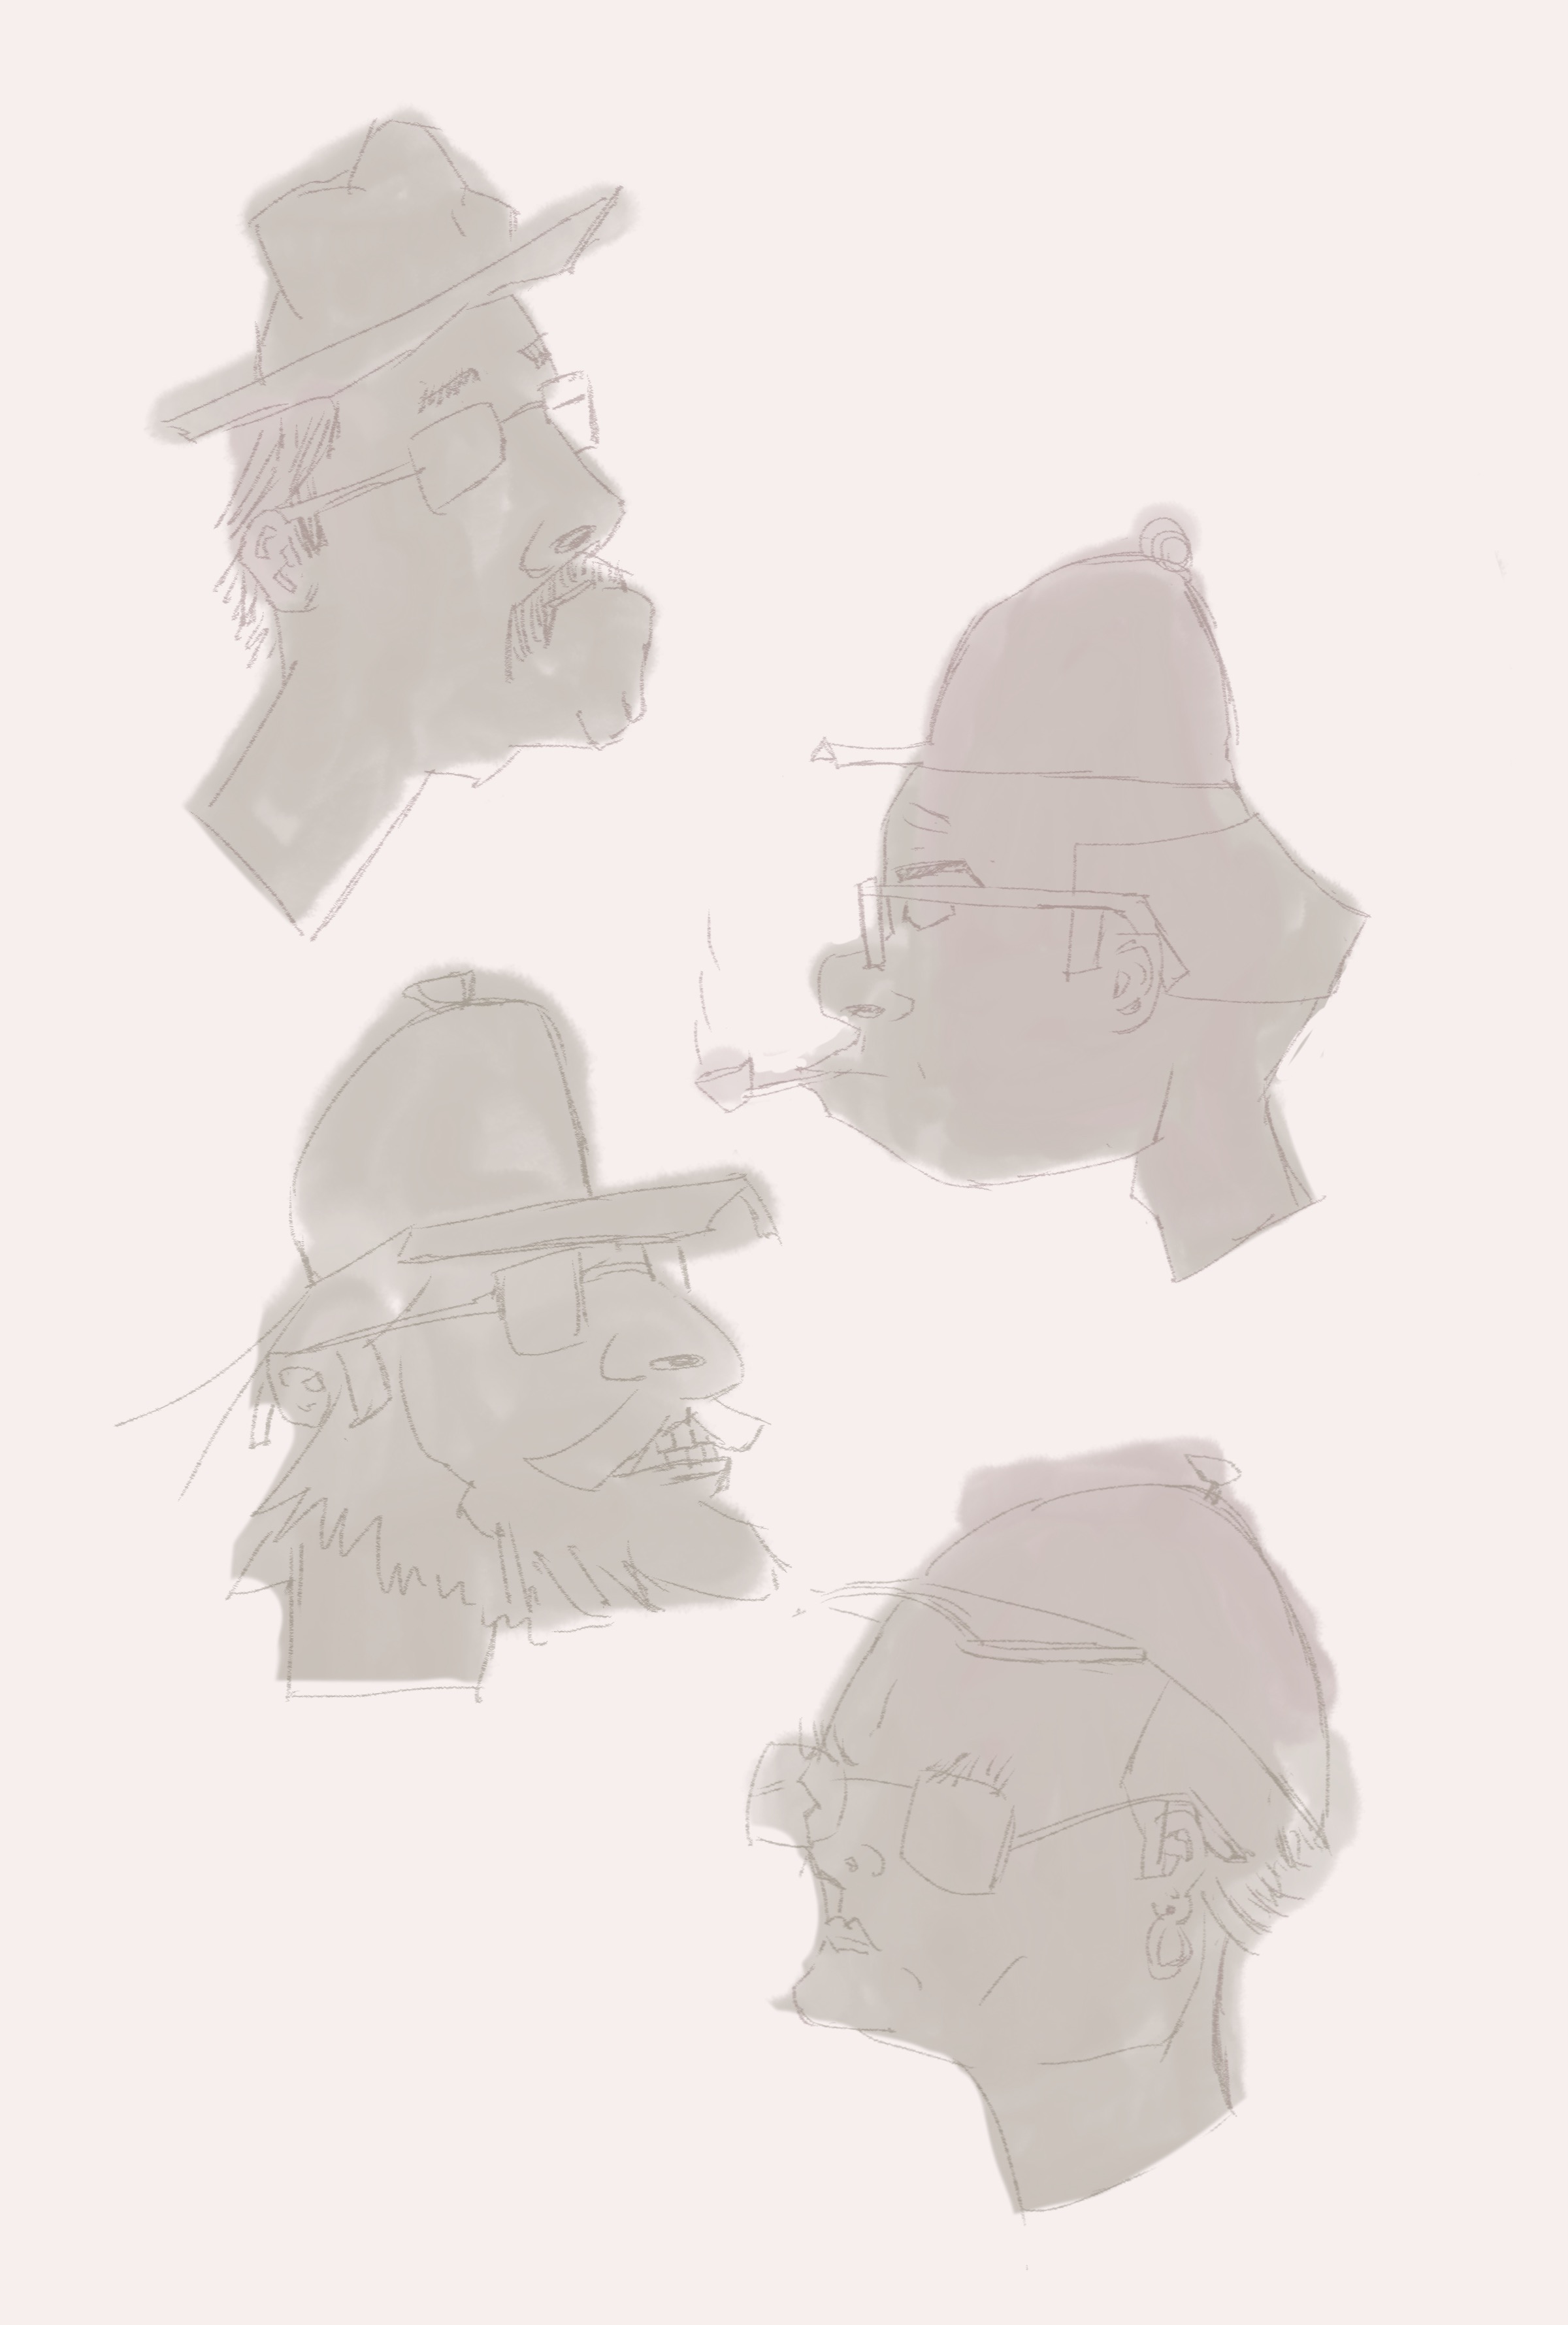
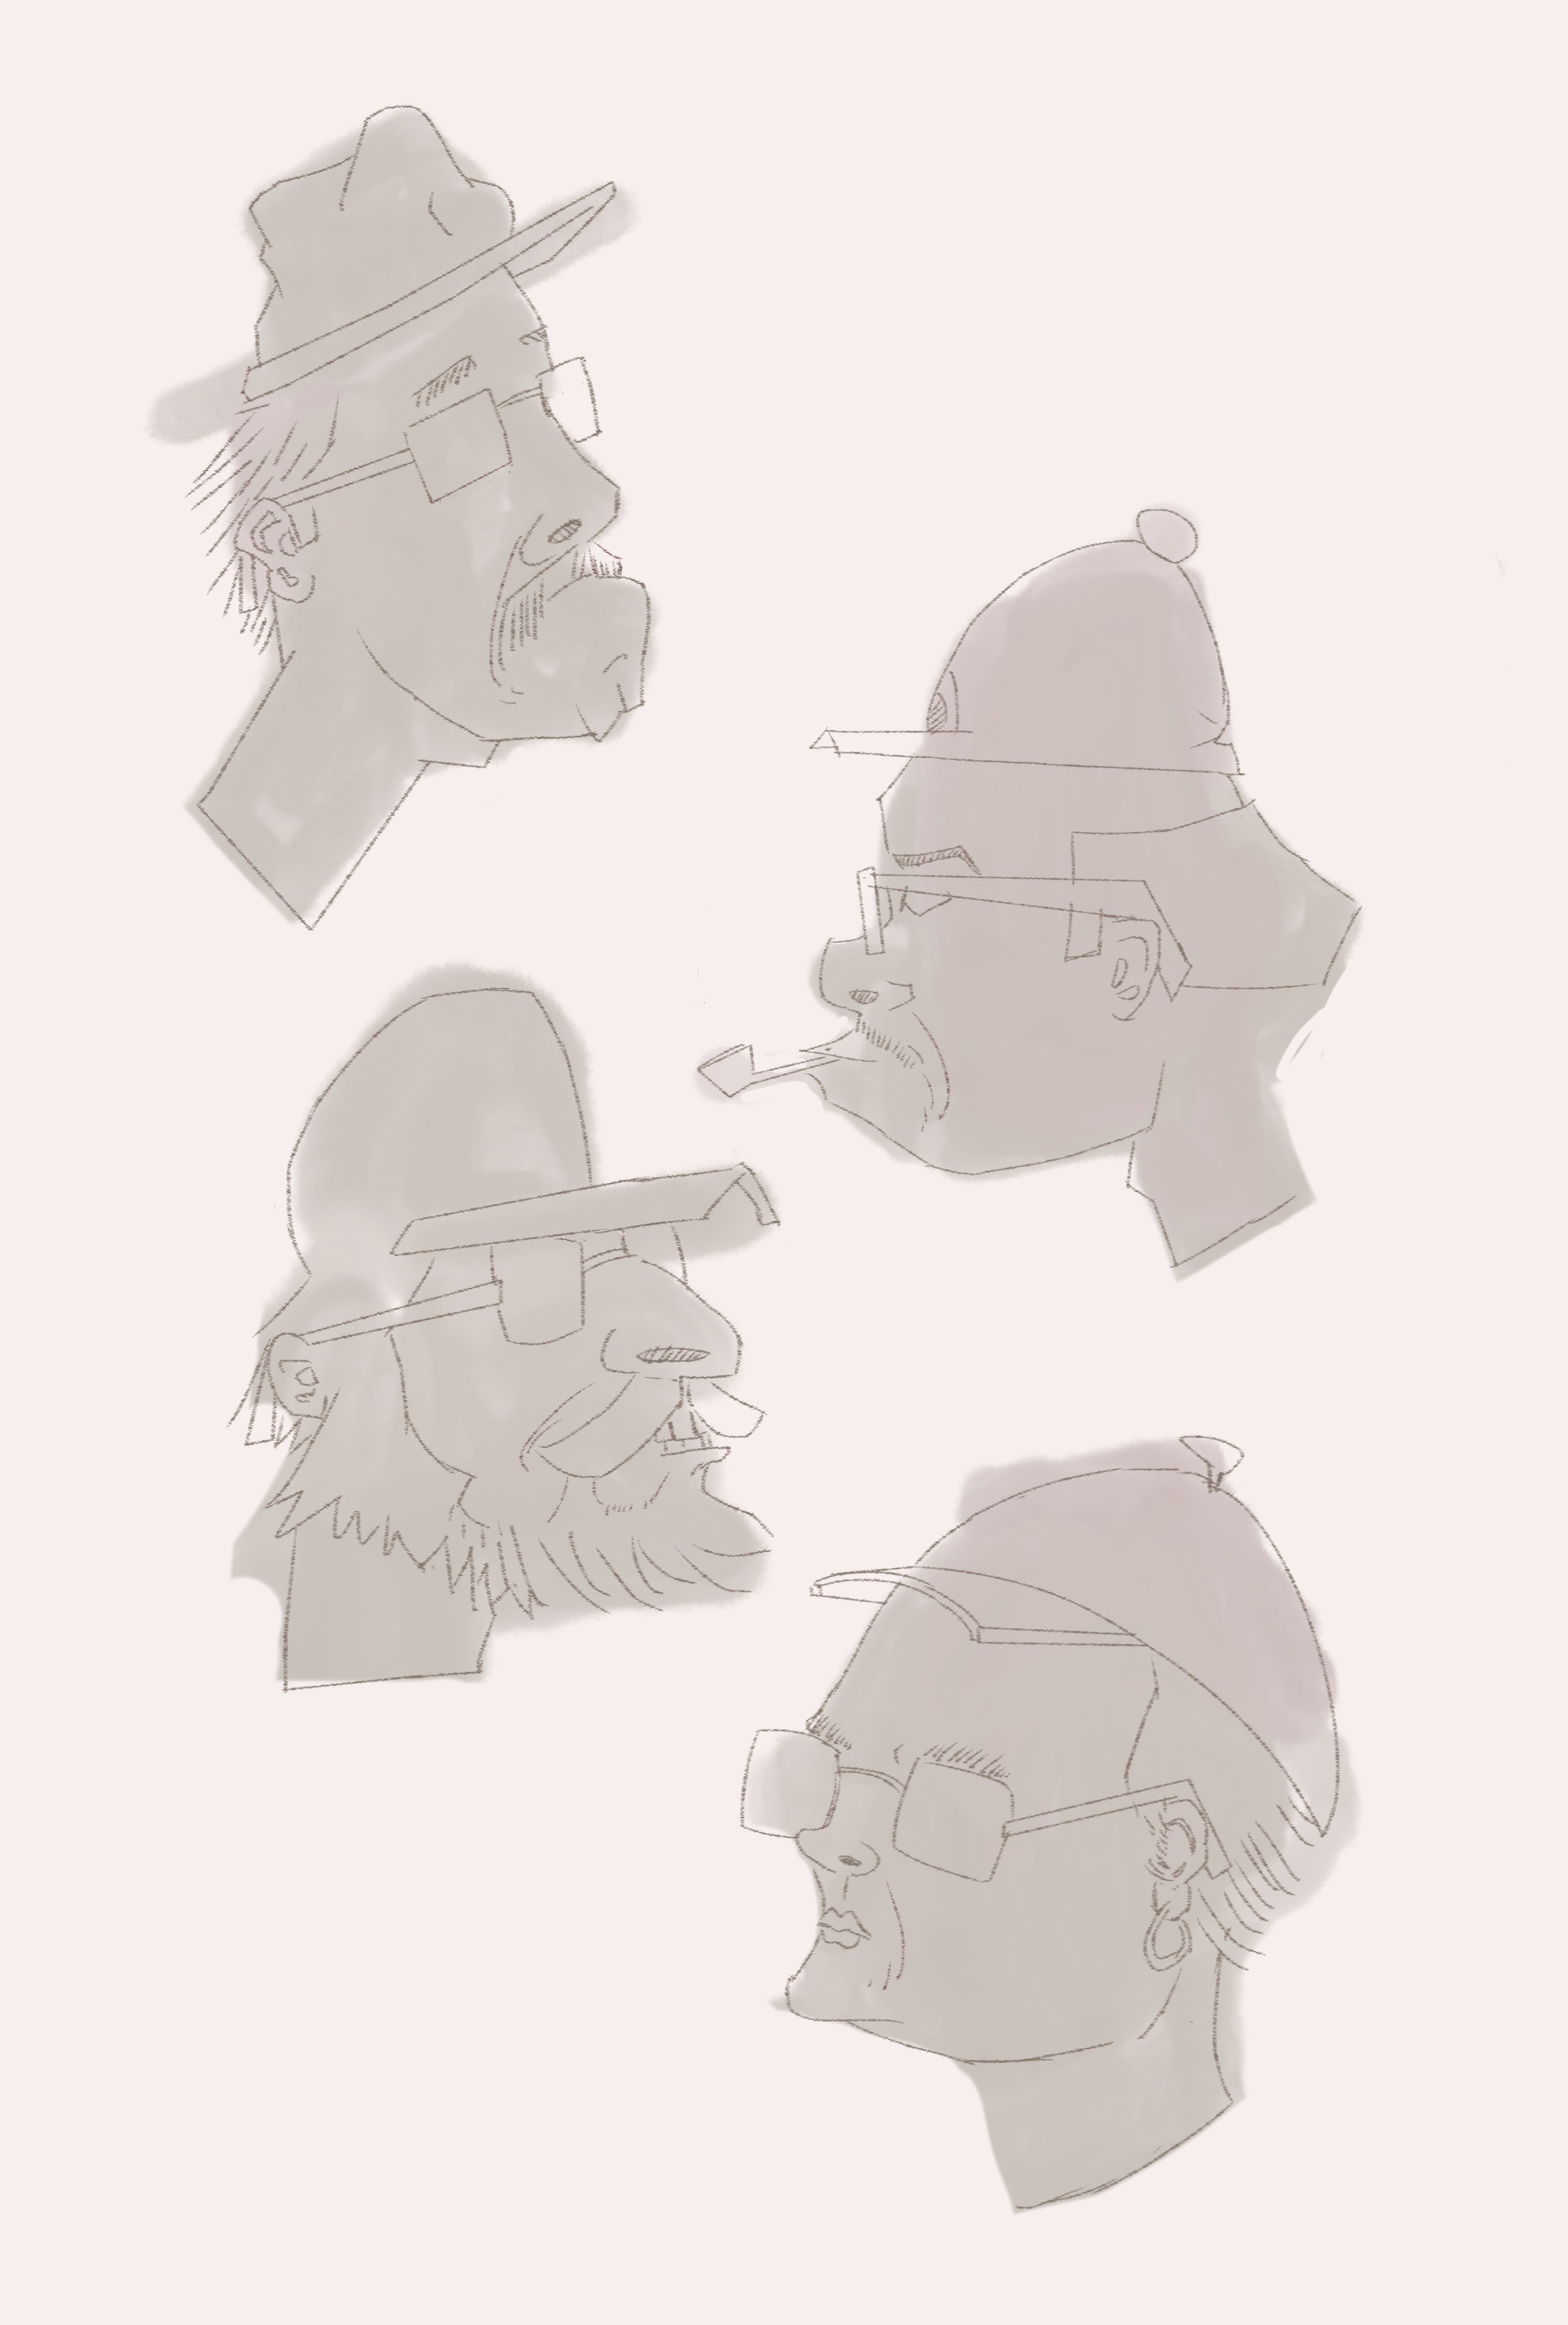
After drawing these blobs, the next step is to draw rough lines over them. I wanted to draw some old people today, and I used these silhouettes like clay in getting that done. It may take more than one try to get the lines right, so don't give up the first time you try.
Drawing line art
Take-1
Take-2
Colours, shadows and highlights
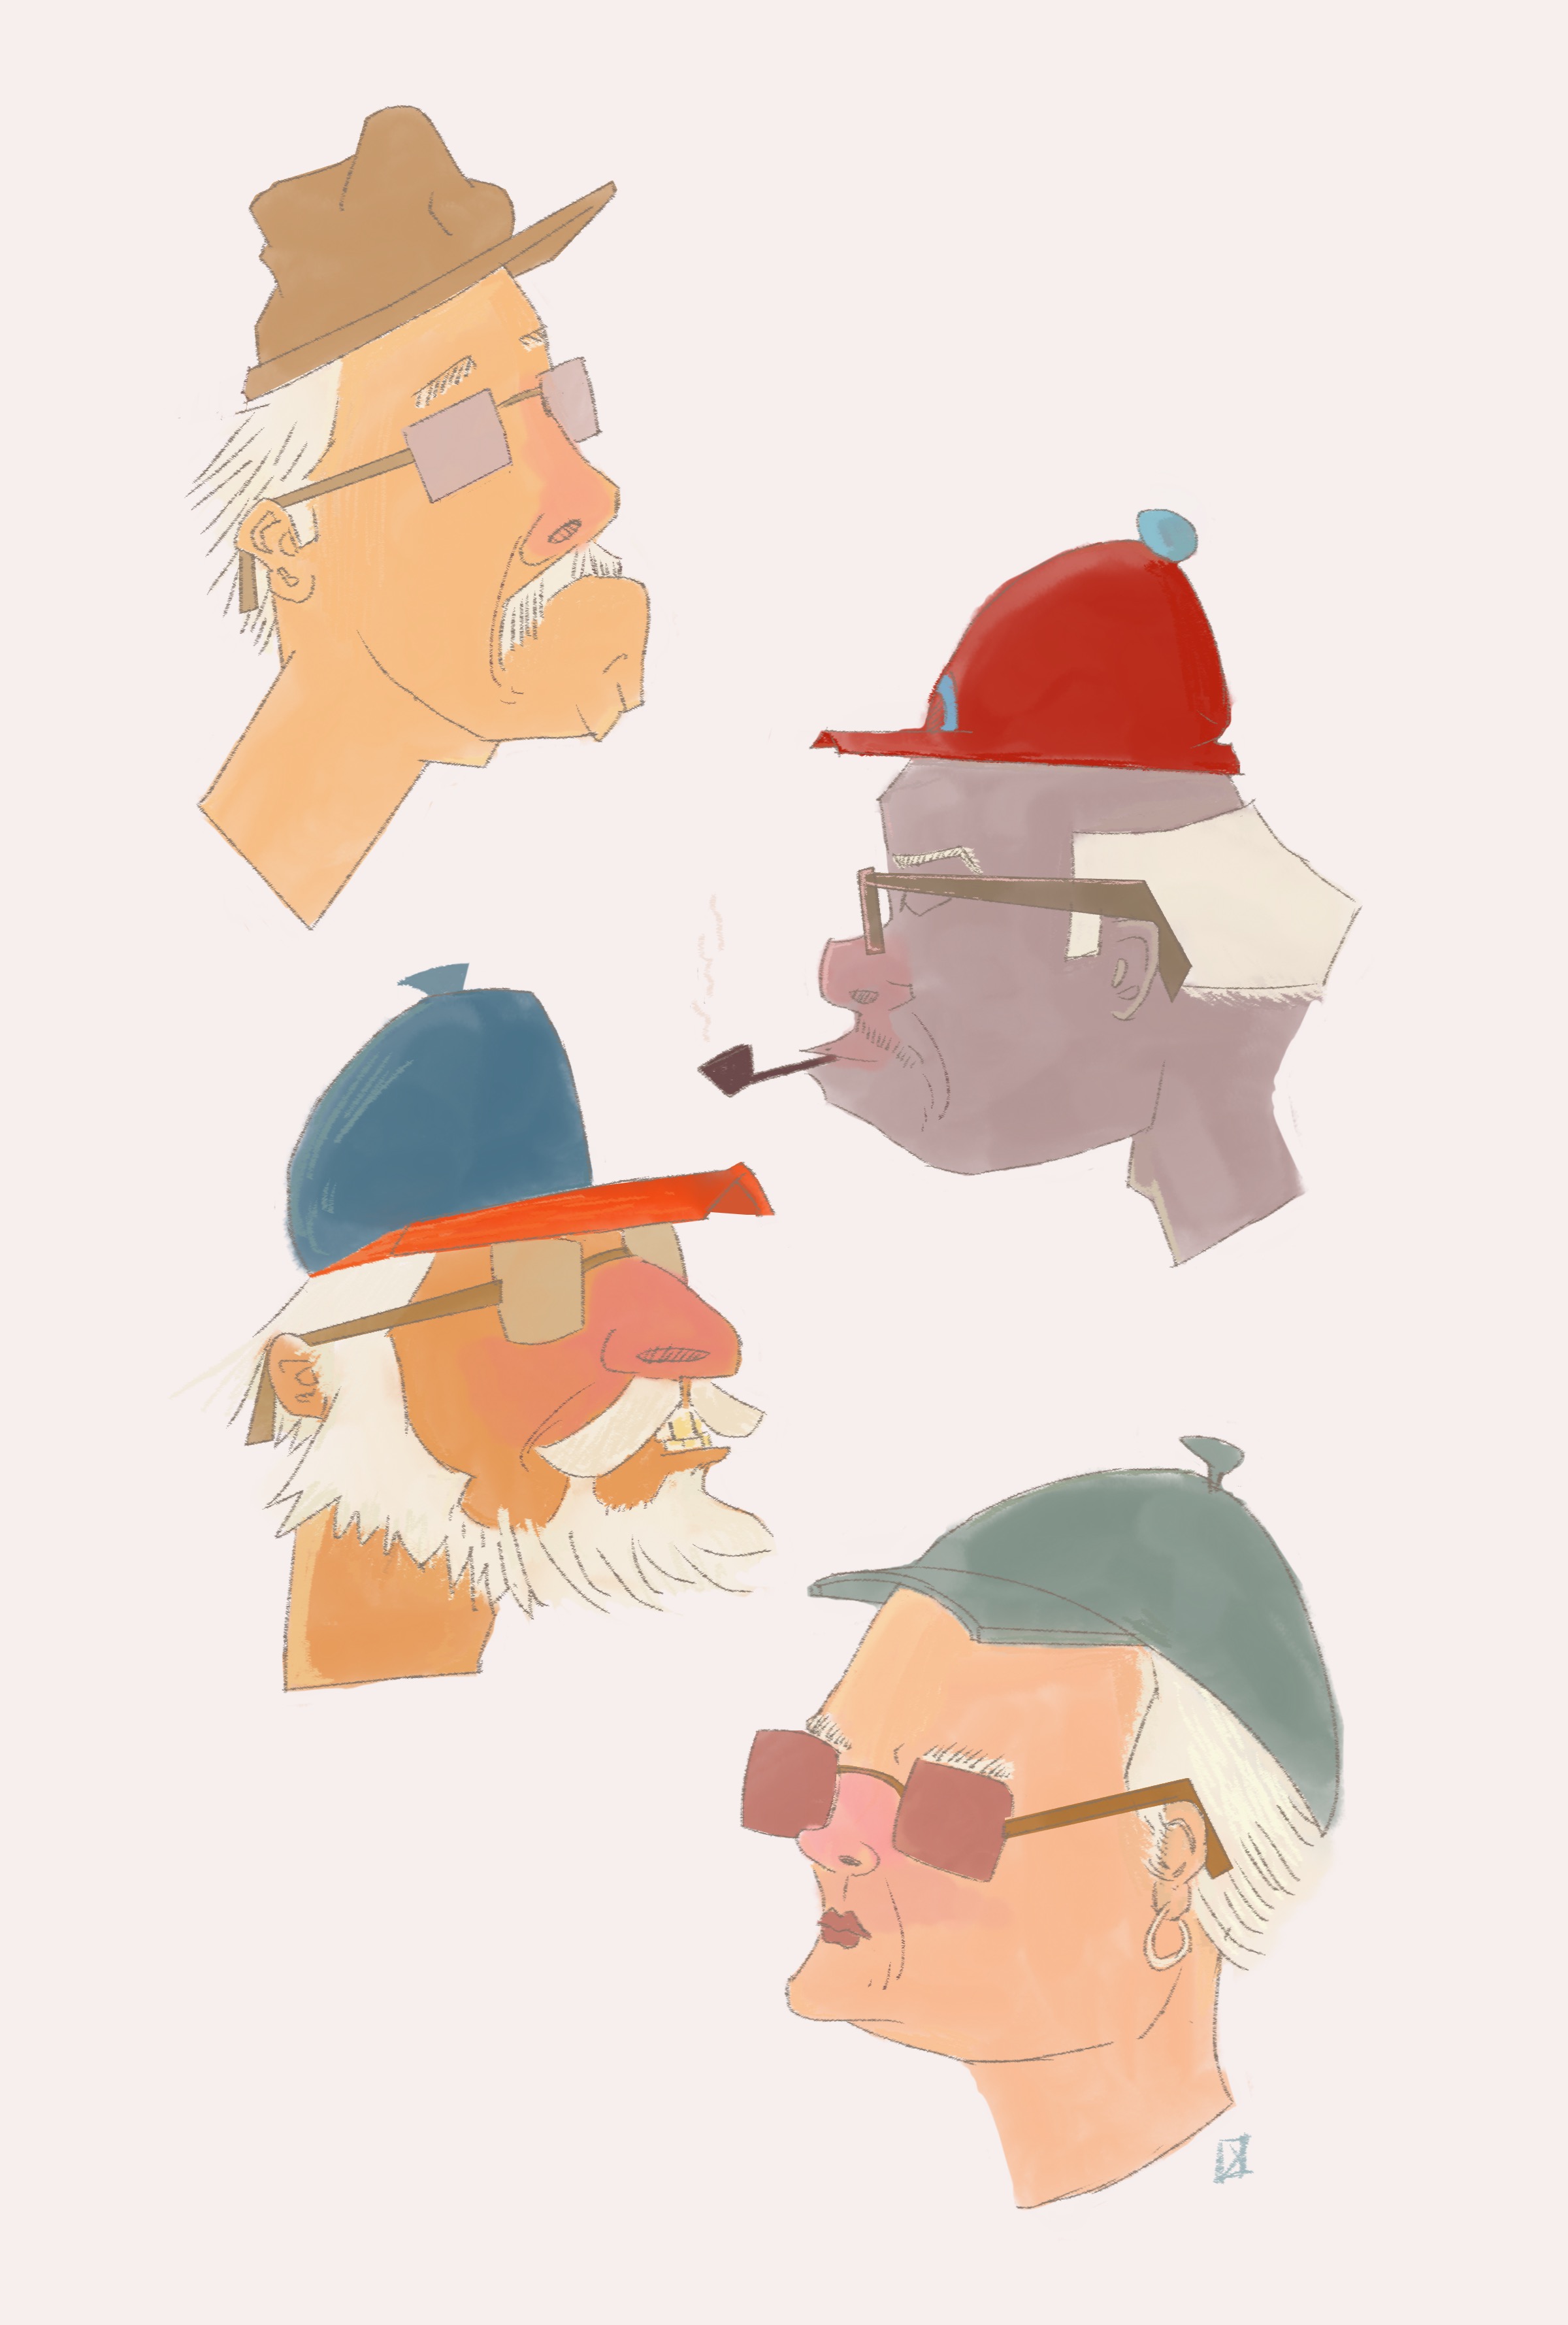
If you are satisfied with this step, move on to adding colours. It is best to use a minimum number of colours for practice, and if you want to use any of these for a full fledged character design, you can think of adding more details at a later stage.
I used a basic colour palette, but I wanted to add a couple of layers more. One for the shadows and one for the highlights. Blend mode for the shadows layer is 'multiply', and the highlights is 'screen'. For the shadows bit, I chose a softer shade of grey(RGB: 204, 204, 204), and for highlights, a lighter shade of objects from the underlying layer. For example, if I was trying to add highlights to old man with a pipe, I would use his hat's red, and select a lighter value for the highlights layer, and the outcome looks like this. Lastly, cleanup the outcome after you are done.
Note that the silhouette need not match exactly to the line art. The thumbnails are meant to guide you to think creatively, they may not be the limits of your imagination.
Tools used: Wacom and Sketchbook Pro
Happy sketching!


Comments
Post a Comment